To create a WPF User Interface using XAML , first we will have to understand the what the XAML structure is, I am assuming you have an understanding of XML markup. XML is an internet technology and Microsoft has done a hard work here to bring this internet technology into the desktop user interface development pattern.
First we will understand the limitations of XML.
First we will understand the limitations of XML.
- In XML , Explicit references are not allowed.
- XML is content driven the XML markup cannot be declared and used else where as in our traditional coding technique.
- XML always represents a state and not a behavior.
- XML doesn't support inheritance.
Now if we look at the above points we get to know that with XML is content driven , but this leaves us with a very important question, How does the WPF framework validate this XML?
Lets consider the below problems with using XML and their solutions.
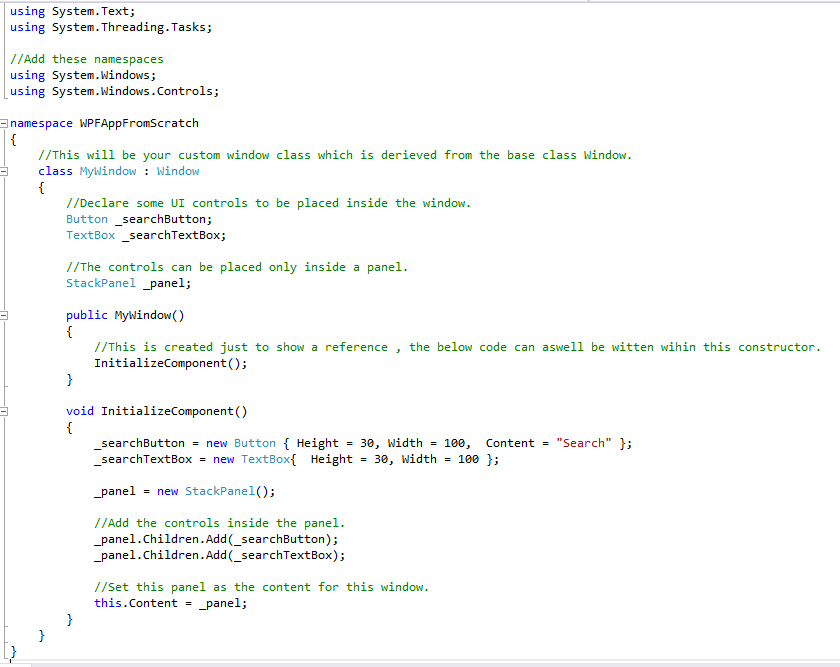
In my previous article about developing a WPF project from scratch , I had developed a WPF UI and attached it to the application without making any use of XAML. this seemed straight forward as it involved declaring and initializing the UI controls and Window using C# code and setting it as the content. This was straight forward for the WPF framework and the compiler as well since all it had to do was make the use of reflection and validate the structure of the controls and its properties. But now the question is How does the WPF framework achieve this when the UI controls are declared in the XML?
Microsoft has introduced a special kind of parser for the XML now refereed as XAML where the parser makes use of the reflection technology and validate it to be of correct structure. But how does it refer to the correct DLLs to validate? since we know that the namespace reference we add in an XML document is of a special convention in the form of a URI, URL or a URN
The answer to this is that this is achieved with a special kind of a namespace resolution mechanism using the
class XmlnsDefinitionAttribute This class makes the mapping between the .NET libraries (DLL) and the XML compliant namespaces.
OK, now coming back. let me show you a simple example of a XAML window declaration
Here in the above code we can see that we have a window tag , this represents a window and within which we have the name space defined as xmlns="http://schemas.microsoft.com/winfx/2006/xaml/presentation"
Note that the namespace definition has begun with xmlns this tells us that a namespace is defined and its the default for this current window. the reason being that it is not aliased , if you want to provide an alias to this namespace then the xmlns has to be followed by a colon ":" and the alias name hence it will look something like this
xmlns:myalias ="http://schemas.microsoft.com/winfx/2006/xaml/presentation"
We also know that in XML we can also provide attributes within each elements , if we look at the above XML structure we see that after the <Window> element we have its child element as <Window.Content>
you may be wondering what this is since we have not come across such naming conventions in XML. In case of XAML we can define the structure of the properties for the elements in XML by Attributes or as child Elements.
But when do we know which one to choose? The answer to this is, if the value for the property is complex then we have to go with a child element and if the value for the property is simple then we can define it as an Attribute. For example since the content property for the window is not simple and holds more than just a value its a complex and has been defined as a child element to the Window element. But this gives us another problem, how will the parser know which complex property value belongs to which element ? to resolve this the element name whose property has to be set is appended with its property name to form the child element name for example. the content property which is a complex property for the window has to be set the element now becomes <Window.Content> </Window.Content> this will tell the compiler that the Property named Content will belong to the Element Window.
We can also see that in the <Button Content="Search" Height="30" Width="100"></Button> element the Content property is set as an attribute as we can see that only the text value "Search" is provided and hence this becomes a simple value for the attribute , it is the same for Height and Width as well.
With the above information lets create a sample project where the UI is developed using only xaml.
Lets begin.
Step 1 : First create an empty project.
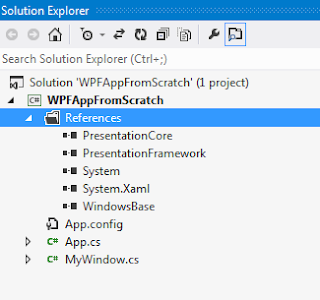
Step 2 : Add the following DLL reference in your project.
Presentation Framework
Presentation Core
Windows Base
System.xaml
This is better shown below. Click on it to enlarge.
Step 3 : Add two New classes to your project
App.cs
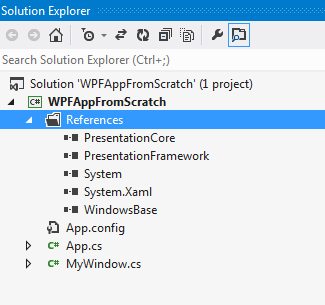
Step 2 : Add the following DLL reference in your project.
Presentation Framework
Presentation Core
Windows Base
System.xaml
This is better shown below. Click on it to enlarge.
Step 3 : Add two New classes to your project
App.cs
Step 4 : Add a new XML file to your project and name it SearchWindow.xaml
Now open this XAML file and paste this code in it.
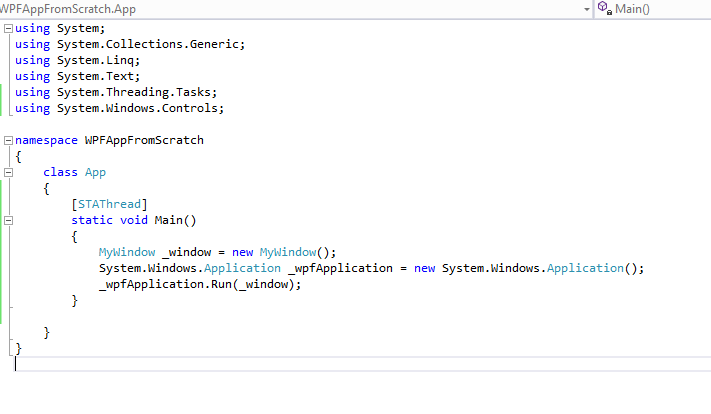
Step 5 : Open your App.cs file and paste the below code in it.
Step 6 : Now right click on the project the click on properties. Here in the Applications tab set the output type of the project to Windows Application as shown below.

Step 7 : All done. you are good to go now. click on debug and you will see this below window.

This window is your own custom window. Congrats , you just created a WPF project from scratch..
Step 7 : All done. you are good to go now. click on debug and you will see this below window.
This window is your own custom window. Congrats , you just created a WPF project from scratch..